“Mail Extractor Max” is a software program that converts Apple Mail emails to various formats including Olm, Rge, Mbox, or Eml.
Note: If you are planning to move data from Apple Mail to Mac Outlook 2011 / 2016, then we recommend you to try our another software called ‘Mail Extractor Pro‘. Mac Outlook can import OLM, PST and RGE file format. Mail Extractor Max can convert Apple Mail to RGE file format and Mail Extractor Pro can convert Apple Mail to PST file format.
The tool outshines in its ability to thoroughly convert each and every element from Apple Mail emails, without any data corruption. It also supports both options to automatically load “Mail” folder or manually load Mbox files.
How to Convert Apple Mail to OLM, RGE, MBOX and EML files
You can follow the steps below that will take you through the conversion process systematically:
- Download “Mail Extractor Max” and install it on your Mac
- Once installed, launch it from the list of your installed applications.

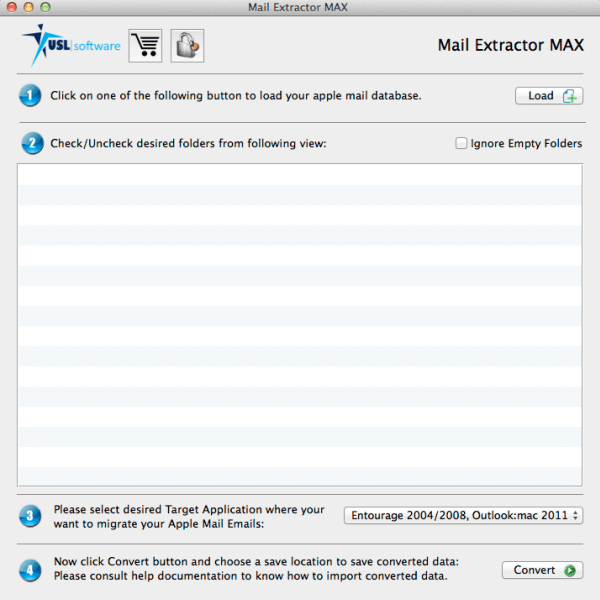
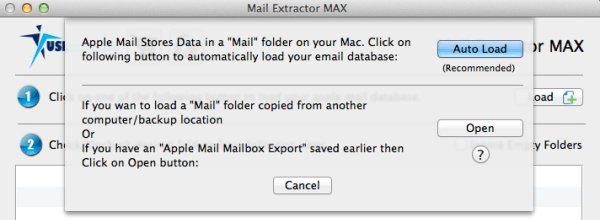
- Click “Load”, which presents two different options to select Apple Mail data.

- Click “Auto Load” to automatically load the “Mail” folder that contains Apple Mail data.
- Click “Open” to manually load the “Mail” folder from custom location or to load the Mbox files directly from any location.
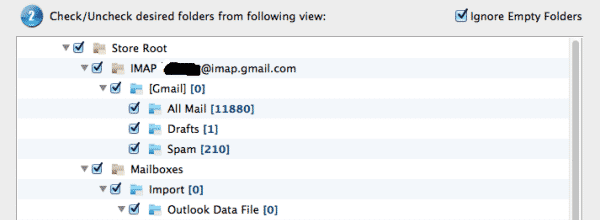
- Next, the tool displays all the folders that are inside the selected files.
- Select the folders you want to convert by checking the boxes next to them. Uncheck all the others. Also, you can check the box “Ignore Empty folders” to hide all the folders with nothing inside them from the section.
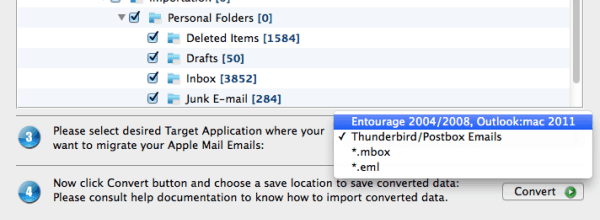
- Choose the desired output format according to where you want to move your emails. The available choices are –
- Entourage 2004/2008
- Outlook 2011 for Mac, (Can import *rge files)
- Thunderbird/Postbox
- Mbox files
- Eml files
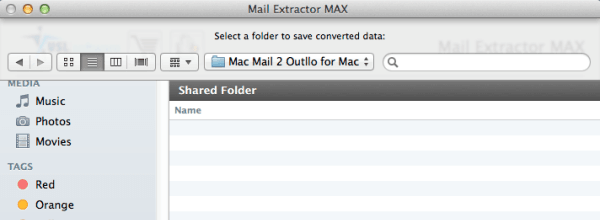
- Click “Convert”. It will ask to select a folder to save converted data.
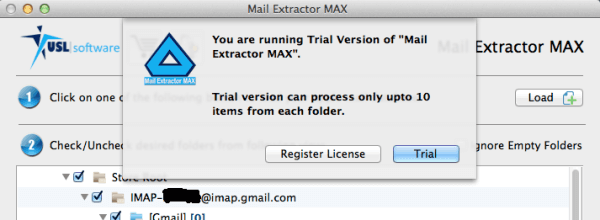
- Click on “Trial” to use it as a trial version or click on “Register license” to order the full license. The trial version will only convert up to 10 items from each folder.
- A window will open. Choose the folder and location to save the converted files. Click “Save”.
- Sit back while the tool converts the data.
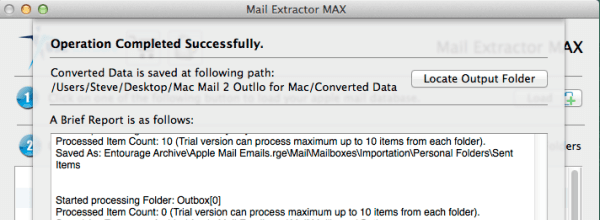
- At completion, the confirmation box will appear. You can directly go to the location where the converted files are stored by clicking the “Locate Output Folder” button on the confirmation window. Or click “Open report” to review the details of the conversion.
- Click “OK” to finish.
 The available choices are –