Looking to import email from Outlook 2011 to Mac Mail?
Unfortunately, it’s not possible using just Outlook 2011 OLM files. You need to first convert them into Mac Mail supporting file format. And that can become a nasty job if you are not sure what you are doing or if you don’t have any assistance of an IT expert.
However, with the help of “OLM Extractor Pro“, this can be done in simple six steps. And more impressive than that is, that you can now perform this otherwise demanding job more effortlessly, quickly, and more accurately than ever before. Offered by USL Software, “OLM Extractor Pro” is what the world needed to import mails from Outlook 2011 to Mac Mail.
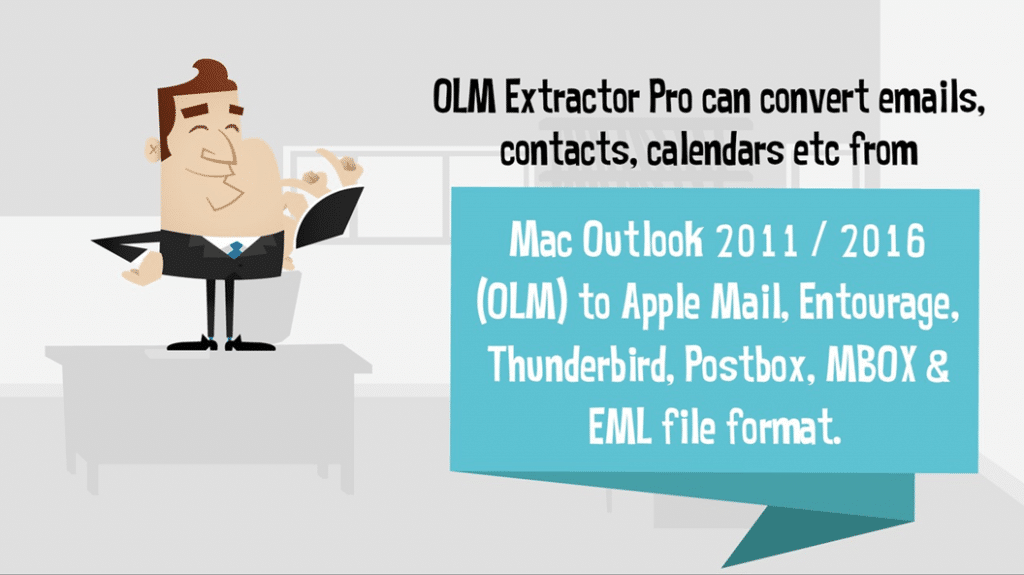
Before proceeding to the tutorial below, get the setup of “OLM Extractor Pro” here. Install it like you’d install any other program on your Mac, launch it from the Applications list, and you can start using the tool with the help of a tutorial below, in its free trial mode. If you are satisfied, you can get the full version.
The trial version has no restriction on features as such, but the conversion is supported for only up to ten items per folder. It’s perfect to get a genuine impression of how the tool works in action.
Click here to get the setup.
4 Steps to Import email from Outlook 2011 to Mac Mail!
- Add OLM files

- Select what you want to convert

- Choose the Output format

- Click on ‘Convert’

Other Options You Should Know
First Step:
The first step is to have OLM files ready for conversion. Most users might already them; they can skip to the second step. If you don’t know how to get your data archived to OLM files from Mac Outlook client, follow the steps below:-
On the ‘Tool’s tab, click ‘Export,’ check the items you want to export/archive and choose ‘continue.’ Choose the location you want to save the OLM file, and click ‘Finish.’
Now you have the OLM file you need with the tool “OLM Extractor Pro” to convert it into Apple Mail, Thunderbird Mails, MBOX or EML file etc.
NOTE* – You can convert multiple OLM Files with “OLM Extractor Pro”. This batch conversion is one of the distinctive features of “OLM Extractor Pro.”
The first step is not strictly related to “OLM Extractor Pro” only. It is required no matter which OLM to Mac Mail converter you use.
Second Step:
Now is the time to launch your “OLM Extractor Pro” from Applications window in Mac. Don’t worry if it is still the trial edition. Simply click “OK” when it shows the warning that you are using the trial edition.
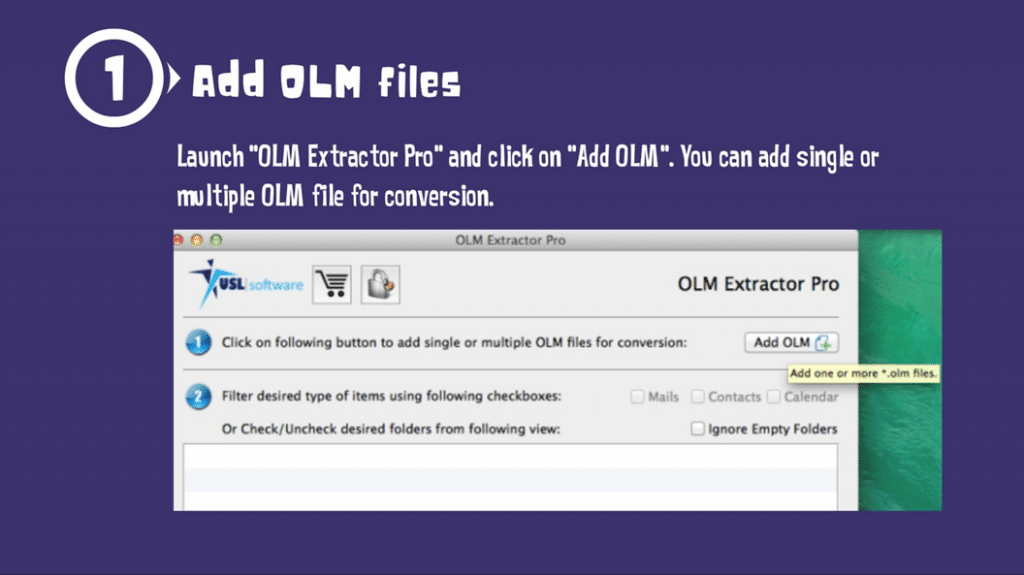
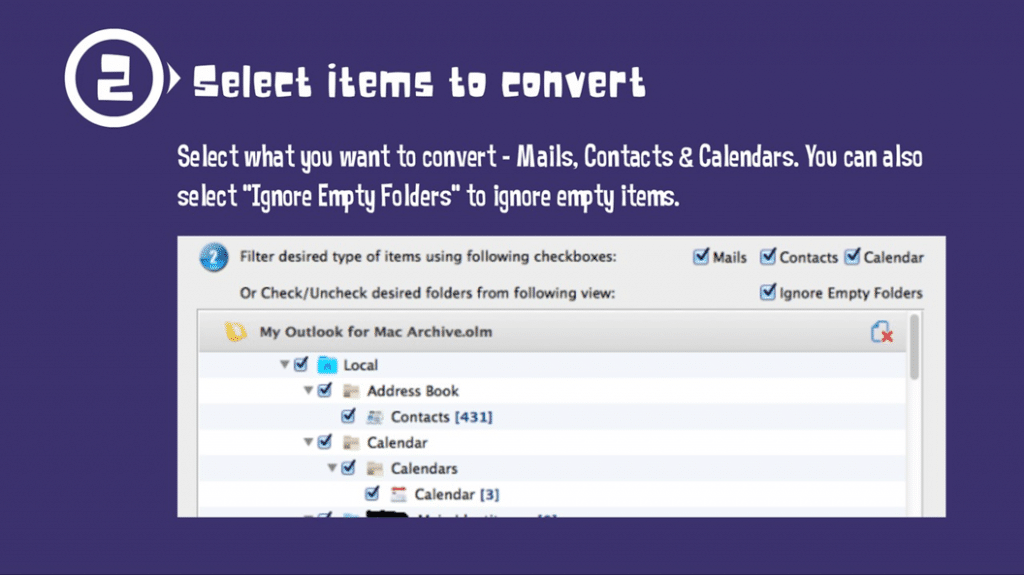
After launching the tool, click on “Add OLM” and go to the location where you saved your OLM files in step 1, and select them. This will get all your folders under the preview section. You can review all the contents that you want to convert. You can filter the folders that contain mails, contacts, and/or Calendars. Or even ignore all empty folders. Once you are satisfied with the selected folders for conversion, more to the third step.
Third Step:
Now is the time to set the optional settings as you’d want. There are three different options that you can change according to your needs.
- 1. Save all read and unread emails in separate folders after the conversion in output MBOX files.
- 2. Merge all contacts from a single folder into a single VCF file. VCF is a virtual contact file that is a generic and standard file format for storing contact information and can be used with many apps and programs.
- 3. Merge all calendar entries from a single folder into a single ICS file. ICS is a native file for Apple pre-installed calendar app, but can also be used with other Mac calendar applications.
Fourth Step:
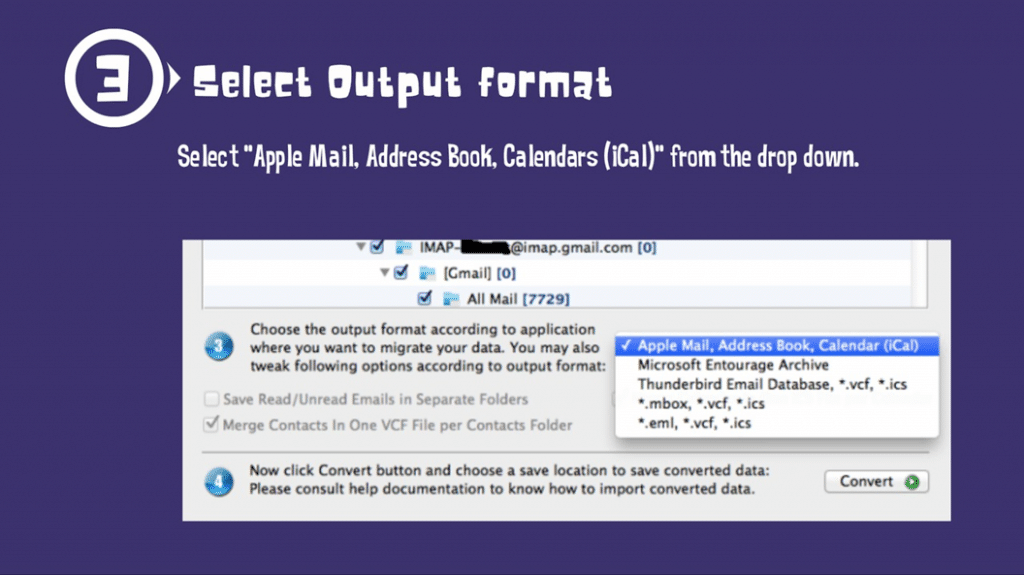
Now, all you have to do is check the output format, the output formats are:
- Apple Mail, Address Book, Calendars (iCal)
- Microsoft Entourage Archive
- Thunderbird Email Database, *.vcf , *.ics
- MBOX, *.vcf , *.ics
- EML, *.vcf , *.ics
NOTE* – You can convert your OLM files to various other formats, such as – Apple Mail, Thunderbird, Postbox, MBOX, EML, RGE for Entourage, etc.
Fifth Step:
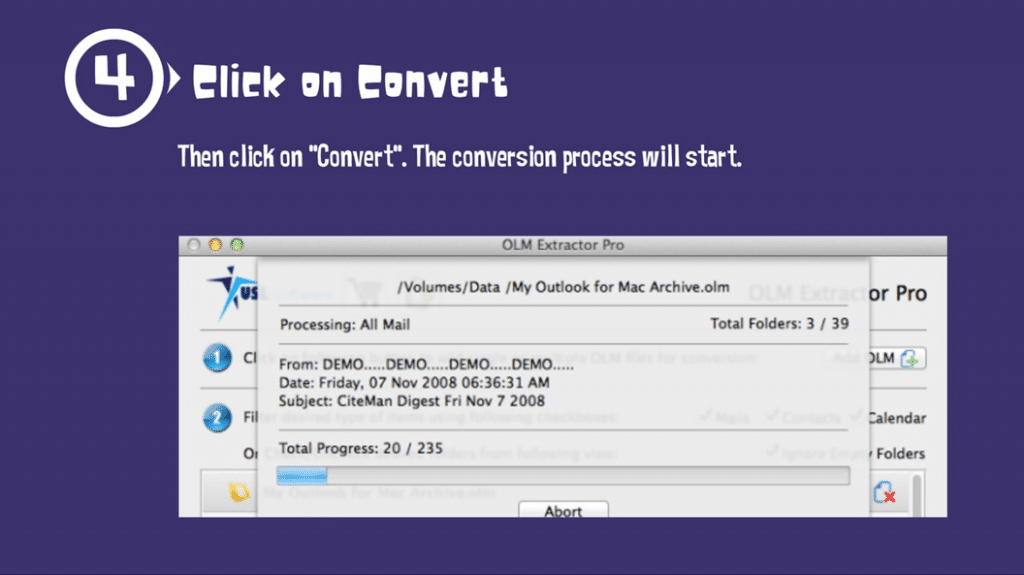
Click ‘Convert.’ Just wait for the tool to finish extracting the contents from your chosen OLM Files into your selected output format. Once done, you’ll get a confirmation window with a link that can take you directly to a folder where the tool saved the output files.
Sixth Step:
Now, you have to import those files to your favorite email client, which is pretty straightforward.
How to Import Converted files to Mac Mail
Launch your ‘Apple Mail’ client, go to ‘File’ –> ‘Import’ –> Choose ‘Mailbox’ and select the converted files that you just converted using “OLM Extractor Pro.” You can choose VCF file to import the contacts as well.
Viola! You will get all your emails and contacts and calendars into Apple Mail in just six steps.
“OLM Extractor Pro” simplifies this process to a surprising degree. No other third-party application or manual methods (like drag and drop, or IMAP sync method) even comes close.
Once again, here is the link to download the setup and try it yourself to import Outlook 2011 to Mac Mail.

